Hadabot is a robot kit for software engineers looking to learn ROS2 and robotics in a hands-on manner.
Hadabot ROS2 robot kits are available for purchase!
The Hadabot uses an ESP32 microcontroller to actuate its motors and collect sensor data. The ESP32 communicates wirelessly to a Docker stack of containers running ROS2 on your local host machine. By leveraging Docker containers to run the ROS functionality, we remove setup headaches, sandbox the tons of libraries needed by ROS, and still ensure security and privacy.
The user interfaces to program, compile, and interact with the Hadabot are predominantly web browser based. This makes user experience consistent across multiple host platforms.
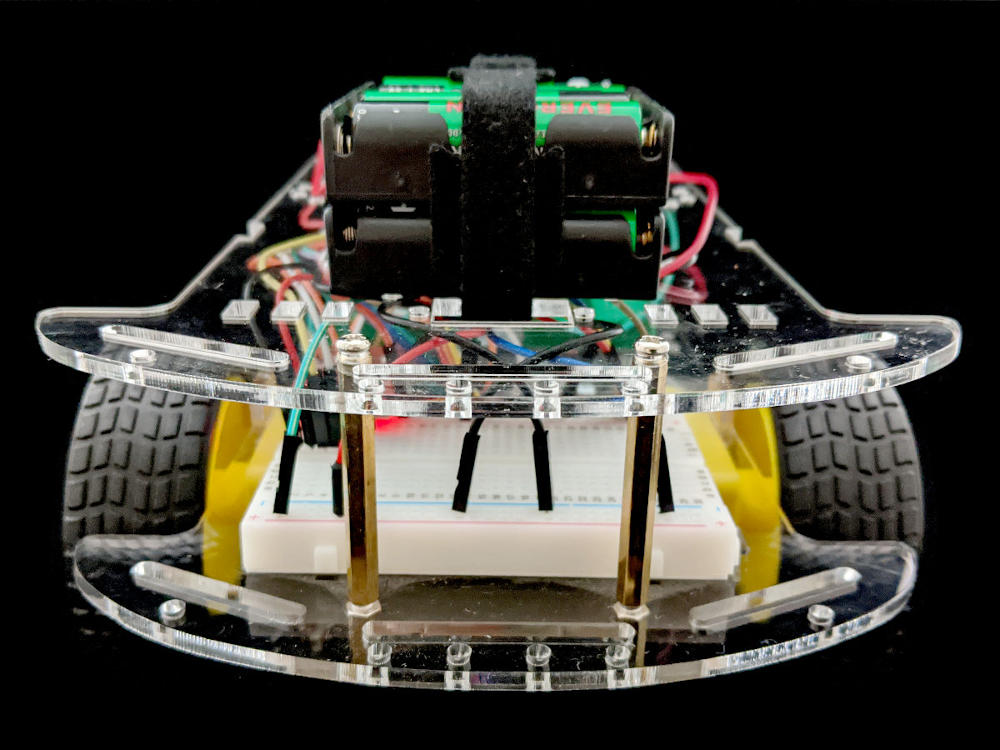
As a wheeled differential drive robot, the Hadabot's left and right wheel rotational velocities determine its motion. If both wheels rotate forward at the same velocity, the Hadabot moves forward in a straight line. If one wheel rotations forward, and the other backwards at the same velocity, then the Hadabot will turn in place about it's rotational center.
But to teleoperate a Hadabot, we don't want to think about individual wheel velocities. We want to think "go forward, while turning at a certain speed". In other words, while it may be more direct to specify how fast each wheel to turn, but it is actually more intuitive to think of robot motion as if it is an unicycle.
Turns out, most mobile robot control systems assume an unicycle robot model. Rather than specify individual wheel rotational velocities, the control system specifies a linear velocity forward, and an angular velocity on how fast the robot should turn.
In this post, we'll go through the math equations that converts unicycle robot commands into left and right wheel rotational velocity commands for our differential drive Hadabot. Specifically, we'll:
-
Compile and run the ROS2 unicycle to differential drive code using our browser-based development environment.
-
Use our browser-based unicycle teleop controller interface to drive the Hadabot around.
-
Describe the unicycle to differential drive equations.
-
Use our browser-based VSCode debugger to walk through the ROS2 C++ code that implements the equations.
As with past posts, we will also provide a half-implemented variation for you to try to implement the unicycle conversion code yourself.
It should take 30 to 45 minutes to read and follow along with the examples.
1. Setup, update your Hadabot software stack and firmware
Before we run the example, we need to follow step 2a to update your Hadabot Git repository, re-start the Hadabot Docker stack.
This will also set up your ROS2 browser-based VSCode development environment.
1.1 Update the Hadabot firmware specific to this post
-- New to working with Hadabot? --
If you are new to Hadabot, you will need to follow step 2a thru 2d to install a couple of tools needed to flash your ESP32 board, download, update a test firmware, reset the ESP32.
-- New and returning hackers --
Unplug your Hadabot ESP32 and Motor Driver from it's battery power source. Plug in the Hadabot's ESP32 into your host computer's USB port.
You should have all the ESP32 tools installed. Let's install the firmware specific to this post.
On your HOST system:
$ cd hadabot_main/content/p7/firmware
Copy over your WiFi and IP configs from the main firmware folder into the local ./uhadabot/ folder.
$ cp ../../../firmware/uhadabot/hb.json ./uhadabot/
Make sure all the WiFi and IP configurations are still relevant in the ./uhadabot/hb.json config file. If your host development system's IP address changed, you must update the change in the ./uhadabot/hb.json config files.
$ cat uhadabot/hb.json
... to confirm the various settings.
Next, plug in your ESP32 to your computer. Run the clean_firmware.py script on your ESP32 using ampy.
$ ampy --port /dev/<the_esp32_usb_port> run clean_firmware.py
Upload the firmware specific to this post over to the ESP32.
$ ampy --port /dev/<the_esp32_usb_port> put uhadabot
$ ampy --port /dev/<the_esp32_usb_port> put boot.py
IMPORTANT: you must FIRST run ampy --port XX put uhadabot, since boot.py will use files from the uhadabot folder.
* Reset the ESP32
Lastly, reset the board by pressing/releasing the "EN" button on the ESP32 development board.
The ESP32 board has 2 LEDs:
-
One for power which should be red. This power LED lights and stays lit once the ESP32 is powered.
-
The other LED is should be a blue on-board LED which we can control programmatically.
Once reset, the ESP32's blue on-board LED (aka "on-board LED" for the future of this post) should blink a couple of times as it connects to your network and then stay lit once it connects.
* Untether the Hadabot
-
Press the "BOOT" button on the ESP32 to stop it's connection to ROS
-
Disconnect the ESP32 from your host machine's USB plug.
-
Connect the power to the Hadabot's ESP32
-
...then connect the power to the Hadabot's motor driver (in that order).
2. Compile and run the ROS2 unicycle to differential drive code
At this point, you should have the Hadabot Docker stack up and running via docker-compose up -d and your Hadabot should be one with the blue on-board LED lit solid.
Follow these steps:
-
Launch the browser-based VSCode workspace specific to this post (this link points to your localhost so everything is running securely on your local system).
-
In the VSCode Explorer panel, right-click the README.md file -> Open Preview.
-
Follow the instructions in the README to:
-
Compile and run the ROS2 unicycle to differential drive conversion code.
-
Launch a browser-based teleop controller interface.
-
Upon completing the steps in the README, you should be able to drive the Hadabot around using the teleop interface.
3. Unicycle to differential drive kinematics
Unicycle move commands have 2 parameters - linear velocity, \(v\) (meters per second) and angular velocity, \(\omega\) (radians per second).
For our differential drive Hadabot, \((v_{left}, v_{right})\) will represent the rotational velocity, in radians per second, of each wheel respectively.
In our previous odometry post, we described the equations to convert left and right wheel rotational velocities into linear and angular velocities. We are basically doing the reverse when converting from unicycle \((v, \omega)\) commands into \(v_{left}\) and \(v_{right}\) wheel velocity commands.
4. Step through the ROS2 C++ code using the debugger
The unicycle to differential drive code lives in the hadabot_ws/src/hadabot_driver/src/hadabot_controller.cpp file.
By now, you should be familiar with ROS nodes and topics. In our cpp file, we create a subscriber twist_sub_ that subscribes to the unicycle geometry_msgs/msg/Twist ROS message over the /hadabot/cmd_vel topic. When a geometry_msgs/msg/Twist message is received, the HadabotController::twist_cb_ callback is called. The unicycle to differential drive conversion is implemented in that callback.
You can follow the remainder of the README to set a breakpoint and step through the actual code.
Upon completing the conversion to \(v\_l\) and \(v\_r\), we publish out the values as wheel power - pow_l and pow_r. Recalled that our Hadabot subscribes to a normalized wheel power value between -1.0 and 1.0 for each wheel, not wheel rotational velocity. For wheel power, -1.0 represents full power reverse and 1.0 represents full power forward for each respective wheel.
In our code, we convert wheel rotational velocity to wheel power by simply clamping the radians per second \(v\_l\) and \(v\_r\) values between -1.0 and 1.0 and publishing that out as wheel power.
While this may seem unacceptable, it is actually not as obnoxious as it appears. Consider driving a car and expecting to reach 60 kilometers per hour. You would apply the gas pedal until your speedometer reaches 60 kph. There is no direct mapping of how much to push the gas throttle to get to 60 kph exactly. Instead, a driver would use feedback from the car's odometry (via the speedometer) to help them throttle the gas proportionally to the current speed.
In robotics, and control automation in general, this feedback system would be implemented as a PID process. PID will a topic in a future post when we tie together odometry to help us achieve and track a certain vehicular velocity.
4.1 Try to implement the unicycle to differential drive conversion on your own
You may have also noticed another C++ source file called hadabot_controller_diy.cpp in the hadabot_driver package. This file is nearly identical to the hadabot_controller.cpp file except it has only scaffold code for the twist_cb(...) function definition.
Doing is better than reading, so we welcome you to implement the equations yourself by fleshing out the twist_cb(...) function definition and comparing your results with ours. Perhaps we have a bug in our code. =)
5. Conclusion
Thanks for following along this unicycle to differential drive post. In summary, we:
-
Described the equations needed to convert unicycle kinematics to differential drive kinematics, as well as explained the reason why robot controllers tend to abstract movement using a unicycle model.
-
Showcased ROS2 code to control our differential drive Hadabot using a browser-based unicycle teleop controller.
-
Used our browser-based VSCode development environment to step through the code.
Unicycle teleop commands tell our Hadabot how to move. Odometry is used to figure out how the Hadabot actually moved. To do that we need to understand coordinate frames and how ROS2 handles coordinate frames - the topic of a future post as we continue to implement robot navigation on a Hadabot. Our goal is to enable our Hadabot to navigate to a goal location while avoiding obstacles as well as to perform simultaneous localization and mapping) of its environment (ie SLAM!).
As mentioned before, Hadabot ROS2 robot kits are available for purchase. Purchase a kit and get your (first?) ROS2 robot up and running, allowing you to work along side with future updates!
If you're not ready to purchase a Hadabot kit, sign up to stay in touch about future posts and updates to Hadabot.
As usual, if you have suggestions, have comments, or just want to say hi, don't hesitate to reach out - hello AT hadabot DOT com.
Please share Hadabot with other software engineer hackers and roboticists.
Thanks and happy building!
Jack "the Hadabot Maker"